Showing posts with label Devices. Show all posts

What are the Best 5 methods to Improve Battery life on your Android

By // No comments:
Battery life is always a major concern for every smartphone user all over the globe. With greater power comes the greater performance but with bigger android device comes the greater battery drain. Nowadays, almost all the smartphones have a bigger display and a trend of AMOLED and super AMOLED display is growing among the smartphone technology. Because of this AMOLED screen, battery drain has become a very big issue. So I present you the top 5 methods which will definitely increase the battery life and thus increases the performance.
battery image showing alt text


Some of the methods mentioned below are only Android Nougat or Marshmallow specific. If you don't find them on your phone then just skip it to next step.

  1. Every smartphone have different battery needs and uses energy based on which apps you use and what hardware your device is using. To have a clear idea which app is using more energy, head over to the settings<battery and here you will find the list of processes which consumes more amount of battery. You can observe that it is the screen which consumes more amount of battery. All the modern smartphones and tablets are 90% covered with the display. So you need to make some tweaks with the display settings. Go to display settings and disable the adaptive brightness(Auto brightness) and ambient display. If you turn off these settings then the display sensors which keep running in the background eating the battery will be stopped. It is always recommended to adjust the brightness manually.
    adaptive brightness image showing alt text
     ambient display image showing alt text


  2. (Android N Specific)Next step is to go to settings< About phone, tap on build number 7 times.Now go back and you will find a developers option, just tap on that and scroll down and tap on inactive apps. There are always some apps that you don’t want to delete them and you want them to be present on your phone but these apps may keep running in the background, eating up your battery. If you make them inactive, they won't be running in the background.  So, just select the app and make them inactive. This will surely, improve the battery performance.
    inactive apps image showing alt text

  3. Next method is to turn off the unused services when not in use.  Turn off the Bluetooth, location, and Wi-Fi when you are not using them.
    Also Check: Android Fastboot Reset Tool

  4. Updating the phone is very important. New updates come with lesser battery drain so it is suggested to check for updates and update your android system with the latest version if available.
    android n image showing alt text

  5. Sometimes, you can fix the issue by restarting your device. You may be thinking what happens if we reboot? When you close some of the apps, they do not get closed and keep running in the background and turning off the phone will forcibly close those processes.
There are some other small tweaks which also enhances your android experience by improving the battery capacity.
  • Turn off the auto sync of data in account settings.
  • Turn on the built-in battery saving mode in battery setting.
  • Get rid of background processes whenever possible.
  • Remove the widgets that you never use.
  • Use a dark color wallpaper for your display.

Final Words
I have tested these methods with many devices and it worked for me. If the above-mentioned steps have not fixed the battery issue on your device then there may be a problem with your battery, go ahead and change your battery.

Guaranteed method to Unlock Bootloader of Any Xiaomi device

By // 1 comment:
Unlocking the Bootloader helps to customize the android platform to an extreme level. You can flash the Custom ROMS, Custom Recoveries, Root your Android and also you can enjoy the tweaks of Xposed Modules. The sky is the limit for customization after unlocking the Bootloader. The procedure to unlock the bootloader in NonXiaomi Phones is pretty easy. You can unlock the bootloader of Motorola, Samsung, Nexus, Lenovo and LG phones in few minutes. But for doing the same task on Xiaomi Phones is not that simple. It takes a time of 5 to 10 days for unlocking the bootloader on any Xiaomi whether it may be Redmi Note 3, Redmi Note 4, Redmi 3s, Redmi 3s Prime, Redmi 4, Mi 4i, Redmi 1s, Mi Note 2, Mi5, Mi Max, etc. If you follow each and every step very carefully without neglecting anything then you can surely unlock the bootloader on your Xiaomi phone.

                                
unlock bootloader image showing alt text

Disclaimer: I have tested this method of unlocking the bootloader with Xiaomi Redmi Note 3, Redmi 3s and Mi 4i and succeeded in it. I hope this method will work with other Xiaomi Devices as well. You should perform the task at your own risk as unlocking the bootloader voids the warranty. I am not liable for any damage.
Also Check: New Look Of Whatsapp

Pre-Requisites:
Flash the Developers Rom on your device.
Your phone must be running on MIUI 6/7/8.

Also Read: Android O 8.0 Oreo is out and find out if your device is eligible?

Downloads:


Steps to Unlock the Bootloader:
  1. On your phone, open settings << Additional Settings << Privacy << Device Administration << Android Device Manager and enable it.  
  2. Go to MIUI Unlock Page and sign in with your MI Account.unlock mi phone image showing alt text
  3. Provide your details and apply for permissions
  4. You will receive an SMS within 5 days for unlocking the bootloader.

  5. After receiving the reply, don't do anything for next 5 days and wait for another 5 days.
  6. Extract the downloaded MI Unlock Tool.
  7. Open MI Unlock Tool and log in with the same MI Account that you used for sending the permissions.
  8. Power off your phone and press volume down key and power button at the same time for 10 seconds and your device will boot into the fast boot mode.
  9. Connect your phone in fast boot mode to the computer.
  10. Click on unlock on the MI tool and the percentage goes from 0 to 100.
  11. Soon your will receive a message on screen saying "Congratulations Unlocked Successfully".


What to do if unlocking the bootloader stuck at 50% or says couldn't verify your device?
 This problem can be fixed if you wait for next 5 days after receiving the permission. And make sure that your phone is running a developers ROM. If you follow above mentioned each and every instruction carefully then you can unlock the bootloader without any issues.

If this method has helped you then please let me know in the comments down below. If you get stuck at any process then pass your issue to me, I will solve the problem in the least possible time.

Things to do after unlocking the Bootloader:
Also Check: Get The Latest Android O 8.0 OreosBootanimation On Your Android 


Xiaomi Redmi Note 4 is launched at Rs.9,999.Here, you get will get to know all about RN4

By // No comments:

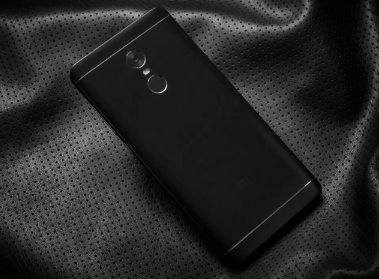
Xiaomi India has launched its first device of 2017, Redmi Note 4, a successor of Redmi Note 3.This phone will be available exclusively on Flipkart. Redmi Note 4 will go on sale every Monday at 12 pm. Phone will be available in gold, silver, dark gray and brand new matte color.                               

Xiaomi Redmi Note 4 Pricing & Variants:

Redmi Note 4 will be available in 3 variants. 2GB RAM/32GB storage variant has been launched at the price of Rs.9,999.3GB/32GB storage variant has been launched at the price of Rs.10,999.4GB RAM/64GB storage variant has been launched at the price of Rs.12,999. All the variants weigh about 175grams. 

Xiaomi Redmi Note 4 Specifications:

  • Redmi Note 4 is powered by snapdragon 625 chipset(Octa Core).

  • 5.5'' 1080p IPS Lcd Screen.
  • Adreno 506 GPU.
  • 32/64GB Internal Storage.
  • Dual Sim with Micro SD Slot. 
  • 13MP f2.0 aperture Rear Camera/5MP Front.
  • 4100 mAH Battery.
  • IR blaster.
  • Fingerprint Scanner.
Other Sensors: Accelerometer, Gyroscope, Ambient Light sensor, Proximity Sensor and Electronic Compass.

Design & Build:

As Redmi Note 3, Redmi Note 4 has metallic build all around.The Build Quality is Top Notch. It comes with strong 2.5D curved glass which comes with good protection.Even it falls from a height of 2meters, it won't break easily.  It has better viewing angles than Redmi note 3. To the back of Redmi Note 4, we have a 13MP f2.0 aperture camera with a wide angle of 77 degrees, below which is dual tone, dual Led flash and at the bottom is MI Branding. To the front, is a 5MP front facing the camera with a wide angle of 85degrees below which is a 5.5" IPS Lcd Screen. At the bottom, we have backlit navigation keys. 
redmi note 4 image showing alt text

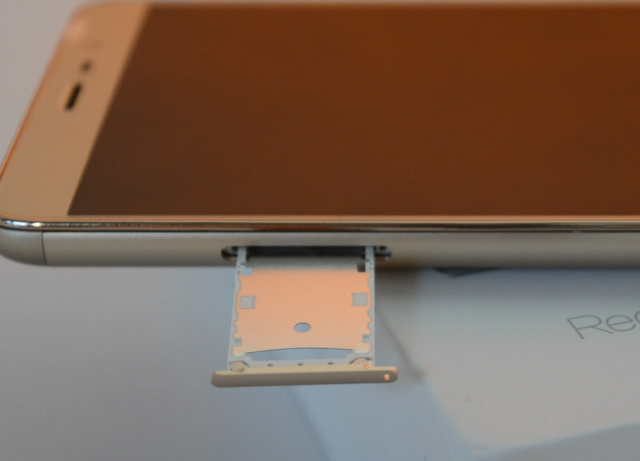
The Dual Sim(Hybrid) Redmi Note 4 supports 4G with VOLTE.  It comes with MIUI 8 on top of Android Marshmallow 6.0 and it will receive Nougat update by June 2017. Redmi Note 3 always produces overexposed pictures.The camera sensor in Redmi Note 4 is improved now, you get fast focusing and excellent pictures with this device. As the camera sensor is provided with dual tone, dual led flash, the low light performance of this camera is excellent.
hybrid slot image showing alt text

Tips for buying Redmi Note 4

If you are using Redmi Note 3 now, you do not need to upgrade it to Redmi Note 4 because there is no much difference between the two. They are similar in design, performance and battery backup. If you are buying Xiaomi phone for the first time then you will not get disappointed. 

How to get one for you?

Xiaomi Redmi Note 4 will go on sale every Monday at 12 pm. I suggest you, be ready at 11:56 am and login to your Flipkart account. As soon as sale begin, just grab it before it goes out of stock. The sale is limited to 10thousand units every week so don't miss a chance to buy it.

Source

Check out the video(by geekyranjit) below for the initial impressions and overview of Redmi Note 4. 

I hope, the information provided in this blog is helpful. If you want to stay updated on latest trends in technology then subscribe to our newsletter and also to our YouTube Channel.


Install CM 12.1 for Lenovo K4 Note [Custom ROM]

By // 6 comments:
cm 12.1 image showing alt text
Good news for CM (Cyanogen Mod) lovers!
CM 12.1 Custom ROM which is based on Android 5.1 Lollipop is now available on Lenovo k4 Note. CM 12.1 is providing its amazing UI experience and you can customize it with tons of CM themes like MIUI 7, XIUI, and 1+1 OS.Follow the instructions mentioned below carefully to install CM 12.1 Android L 5.1 on Lenovo K4 Note.

I thank VVIZARD and other developers for providing this ROM.  
Also Check: New Look Of Whatsapp

DISCLAIMER:
  • This method is tested with Lenovo Vibe K4 Note for more than three times and it worked perfectly fine without any problems.
  • Passion Labz is not responsible if you brick your Lenovo K4 note in case if you do not follow the procedure properly. 
  • This method will void the warranty on Lenovo K4 Note.
  • Key features of Lenovo K4 Note is missing on CM 12.1 ROM - Fingerprint Sensor, Dolby Atmos, and VR Mode will not work on this ROM.
Also Check: Z3X Samsung Tool

PRE-REQUISITES:
  • Your Lenovo k4 note must have unlocked bootloader. If it not unlocked then it is not possible to get any custom ROM on your phone.
  • You need to flash custom recovery TWRP on your phone. This helps to flash any type of zip files.
  • Battery percentage should be more than 70% because if the process is obstructed by the battery then your device may not work any longer.

Also Read: Android O 8.0 Oreo is out and find out if your device is eligible?
DOWNLOADS:

Note
Backup your data using the TWRP, if any step goes wrong or you do not enjoy the rom then you can easily get data back.

PROCEDURE TO INSTALL CM 12.1:
  1. Power Off the device.
  2. Boot into Recovery Mode (TWRP) by pressing both the volume key and the power button simultaneously for few seconds till you feel the vibration on the phone.
  3. In TWRP, select WIPE data.
  4. Click on Advanced Wipe and Check on Dalvik cache/ART cache, Cache, and Data.
  5. At the bottom, swipe on "SWIPE TO DELETE".
  6. Press the home button and select Install.
  7. Select the storage where you have downloaded the zip file and then select the downloaded zip file. 
  8. At the bottom, swipe on "SWIPE TO CONFIRM FLASH".
  9. It will start installing CM 12.1 on your Lenovo K4 note. Installation process may take up to five minutes so wait and have patience.
  10. After flashing the ROM, go back and flash Google Apps. 
  11. Once the process is completed tap on Reboot.
  12. The first boot up will take a long time of around ten minutes. 
  13. Congratulations! CM 12.1 is now successfully installed on your Lenovo K4 Note.
My opinion:
Many android users like me wish to explore different type of UI on their devices. I have used this ROM for about 5 days on my k4 and I was very annoyed by its bugs. Therefore, I suggest you to wait for another ROM to be developed by the Lenovo developers. This is just my opinion, if you wish to have fun with this ROM then you can proceed and get it on your k4 note.

Also Check: Get The Latest Android O 8.0 OreosBootanimation On Your Android 


How to Fix Invalid IMEI on any Mediatek Android

By // 10 comments:
invalid imei image showing alt textIn some of the recent years, Google has done a lot for the progress of android Operating system. Some users are curious for a latest update on android and start installing android's update without OTA which means by installing or flashing new ROM using custom recovery or flash tools. Every Android has NVRAM files which contain IMEI information. When we try flashing custom ROMs, NVRAM files may get damaged. So it is always recommended to backup NVRAM using Droid Tools before Flashing any type of custom ROM. If you didn't backup your NVRAM then do not worry you are at the right place. Follow the simple procedure to fix IMEI problem on any Android Smartphone.
Also Check: New Look Of Whatsapp

DISCLAIMER:
  • This method is only for solving the problem of invalid IMEI on android phones. If you misuse this method to change IMEI of stolen phone then you may land in the court of law.
  • Warranty will be void during this method.
  • This tutorial is for educational purpose.
  • This method is only for devices with Mediatek processor. If you try this method on devices with other processor then it may not work and you may end up bricking your phone.

Dial *#06# on your smartphone and if you get wrong IMEI message on screen or no IMEI message or Invalid IMEI message, it means you have lost  IMEI on your smartphone.
Also Check: Get The Latest Android O 8.0 Oreo Pixel Launcher On Your Android

PRE-REQUISITES:
  • MTK smartphone drivers must be installed on your  windows.
  • Stock ROM of your smartphone.
  • Maui META application on your windows.
  • A windows PC or laptop. This tutorial will not work on Mac computers.
  • Your phone's battery should be more than 60% for this method to work perfectly.

Also Read: Android O 8.0 Oreo is out and find out if your device is eligible?
Downloads:

Maui META application

Google Account Manager

STOCK ROM of your smartphone. (For instance if you use Lenovo K4 note search for "Stock ROM for Lenovo K4 Note) Most of the Stock ROM can be found on needrom.com which provide numerous ROMS for almost all the android smartphones which are available in the market.


Procedure:

  1. Power off the Smartphone.
  2. Open Maui META application. Go to Options<<Connect Smartphone into META mode.maui meta image showing alt text
  3. Click on Reconnect and connect your smartphone to PC.
  4. Your smartphone will be taken into META Mode Now. If it does not boot into META mode then check all the drivers are installed properly.
  5. Now a dialogue box will appear as shown below.
    imei fix image showing alt text
  6. Click on Change NVRAM files and select Database file from the stock ROM  folder as shown below.
    nvdata image showing alt text
  7. Click on Upload from flash.
  8. Provide IMEI of your phone in IMEI section. If you don't know what was the IMEI number of your device then you may find it on your mobile box or just open the back cover of your phone, you will find the IMEI number printed on backside.
  9. Click on Download to flash.
  10. Click on Load flash.
  11. Remove your smartphone from PC and dial *#06# and it will display the IMEI of your smartphone.
  12. Enjoy! you have successfully fixed IMEI on your Smartphone.
If the above information did not fix your problem of IMEI then contact me with your issue @Simraan.shaikh1995@gmail.com 

Also Check: Get The Latest Android O 8.0 OreosBootanimation On Your Android 


Install Custom Recovery(TWRP) on Lenovo Vibe K4 Note

By // 9 comments:
TWRP for lenovo k4 note image showing alt text
For every android geek who wishes to enjoy the features of custom ROM, we have a custom recovery. Custom recovery not only helps to flash different customs but also you can flash any kind of zip files. Sometimes while performing any type of external installation, our data get lost and there are some chances for your phone to get dead. To avoid these issues, we can make a use of this custom recovery to backup all the data present in the ROM. By default, Lenovo devices come with stock recovery which has very less features and you cannot flash the custom ROM through this stock recovery. In this tutorial, you will learn a simple method to flash custom recovery TWRP on your Lenovo k4 note.
I sincerely thank Gursewak, Sevenmars and other developers for providing this recovery.
Also Check: New Look Of Whatsapp

DISCLAIMER:
  • I have tested this TWRP on my k4 note for about 5 times and found this TWRP to be free from all the problems.
  • You have to perform this action of installing TWRP on your own risk. Sometimes, user gets stuck in boot loop.
  • Make sure your Model Number is A7010a48. It does not work for a 2GB variant of Lenovo k4 note.
  • The Fingerprint scanner will stop working if you are running an android version of a lollipop 5.0.1 or below. The sensor is not stopped permanently, if you upgrade your android to marshmallow or nougat then sensor starts working again.
Also Check: Get The Latest Android O 8.0 Oreo Pixel Launcher On Your Android
PRE-REQUISITES:
  • You must unlock the bootloader on Lenovo Vibe k4 Note.

Also Read: Android O 8.0 Oreo is out and find out if your device is eligible?
Downloads:
Recovery image
 Procedure to Install Custom Recovery(TWRP) on Lenovo Vibe k4 Note:
  1. The first step is to root your k4 note. There are many methods to root k4 note, let us go with the easiest procedure. If your phone is running on android lollipop then download kingroot application. 
  2. Kingroot is an apk file which is not available on play store. Before installing the kingroot app, go to settings and then go to security and enable the unknown sources.
  3. Install the app and then click on try root on your display. Your phone may reboot once during the process.
  4. After rooting process is completed, you will receive a confirmation message on the screen.
  5. You can check if your device is rooted or not by just downloading an app called Root Checker from Play Store and click on verify root. If you have followed the above procedure properly then you receive a confirmation in root checker app saying "Device is successfully rooted".
  6. Download and save your recovery image file to your SD card.
  7. Open the RashR app and select install "Recovery from storage" and select recovery image that you have saved in SD card.
  8. When prompted on screen, tap on Reboot.
  9. Your phone will boot into recovery mode which in this case is TWRP.
  10. Enjoy TWRP recovery on Lenovo Vibe K4 note!
The above-prescribed process is for Lenovo k4 note A7010 running on android 5.0 lollipop and may not work with android marshmallow or nougat.
Also Check: Get The Latest Android O 8.0 OreosBootanimation On Your Android 


How to Unlock Bootloader on Lenovo K4 note (Complete guide)

By // 5 comments:

Unlocking the boot loader helps to enjoy the another face of android. If you want to install Custom Recovery on your k4 note then unlocking the Boot loader will make your job easy. Custom recovery helps you install Custom ROM and other zips like Super Su as well. This method will work for both Android Lollipop & Marshmallow.

unlock bootloader image showing alt text
I sincerely thank to Gursewak and Sevenmars for provided all the necessary requirement for unlocking the bootloader.
Also Check: New Look Of Whatsapp

DISCLAIMER: I made this tutorial to help k4 note users to unlock the bootloader in easiest possible manner. Perform this action of unlocking the bootloader at your likelihood because I make no liability if you freeze your phone or damage it.
Also Check: Get The Latest Android O 8.0 Oreo Pixel Launcher On Your Android

PRE-REQUISITES:
Install MTK Drivers on your computer as it is the most important step while unlocking the bootloader.

Download SP flash tool 

Download preloader/uboot

Make sure the battery percentage of your smartphone is more than 75%.

You can perform this method only on windows computer because mac or Linux does not support this activity.


Procedure to Unlock Bootloader On Lenovo k4 Note:


  • Download and install the MTK drivers from google. It helps the computer to recognize your meditake phone.
  • Go to settings<About Phone<<Tap on Build Number for seven times to enable the developers option.

  • Go to settings<Developers options<Enable USB Debugging and OEM unlocking


  • Power off the device and do not connect to the computer now itself.


  • You need to go to SP flash tool and then right-click on it and run SP flash tool as an administrator on your computer.

  • Browse and select the preloader file from patch folder which is present in Lenovo K4 note folder.


  • Click on download and connect your phone to computer. In few minutes you will see a green confirmation saying the task is successful. Now you need to go in advanced mode.


  • Press Alt+Ctrl+v on keyboard which will open our flash tool in advanced mode.
  • In SP flash tool, you will find select windows on the top and then select write memory.
  • Now change address to 0x1c80000
  • Browse the file and select uboot from patch folder which is present in Lenovo k4 note folder.
  • Press download & connect your device to system then in few moments, you will observe a green confirmation on your screen once the task is finished.
  • Power on your device
  • Go to settings<Developers options<Enable USB Debugging and OEM unlocking.
  • Make sure K4 note is switched on and connect to PC.
  • Go to Lenovo_K4_note folder and open unlock_recovery.
  • Now your phone will be taken into fast boot.

  • A black screen will appear on your screen,when asked for unlocking, you need to press volume up key to unlock bootloader.

  • In few seconds, it will unlock the bootloader on your phone.

  • Enjoy now! You have successfully unlocked the bootloader on Lenovo K4 note.
The main intention behind this tutorial is to help users to enhance the android experience by unlocking the bootloader. If you wish to thank me for this tutorial then give this post a like and follow me on my social media sites.

Also Check: Get The Latest Android O 8.0 OreosBootanimation On Your Android 

How to Unbrick Lenovo Vibe k4 note

By // 1 comment:
unbrick k4 note image showing alt text
If your Lenovo k4 note is not starting up or it is stuck at Lenovo start screen then it means that you have bricked your smartphone but don't panic and stay relaxed this blog will show you the simple method to unbrick your smartphone(Lenovo Vibe K4 Note).The reason behind the bricking of your Lenovo k4 note is you might have followed the wrong procedure in installing or flashing a ROM or you might have flashed the wrong files but don't worry just follow the simple steps very carefully to Unbrick your Lenovo Vibe k4 note.

Also Check: New Look Of Whatsapp


PRE-REQUISITES:

  1. Ensure the battery percentage is 75% or more.
  2. Make sure to backup all the data.
  3. Install Lenovo drivers from the internet i.e MTK drivers for your windows.
Disclaimer: This procedure is tested with Lenovo Vibe K4 Note and it worked perfectly fine. Follow the procedure at your own risk. We are not responsible if you damage your phone in case you do not follow the procedure correctly.
Also Check: Get The Latest Android O 8.0 Oreo Pixel Launcher On Your Android

Downloads:


Official Stock Rom of Lenovo k4 note. 

MTK drivers for your version of windows.
A Windows PC with windows XP SP2 or higher. This method will not work on Mac.


INSTALL DRIVERS:

After installing the drivers restart your PC and make sure the drivers are properly installed on your computer.

Procedure to unbrick your Lenovo k4 note or downgrade OS from Marshmallow to Lollipop:
  • Extract  the Stock ROM from the folder. 
  • Open SP flash tool folder and select SP flash tool right-click on it and select as administrator.
  • Click on Browse file and select Scatter file.
  • Click on download only and select Format all+download from various options.
flash tool image showing alt text

  • Click on download on the top left-hand corner.
  • Connect your smartphone (Make sure it is switched off) to the computer. It will be detected by your  PC and start installing stock ROM. In case it is not detected by the computer then after connecting your phone press both the volume keys and power button simultaneously for about 5 to 10 seconds.
  • Once the  download is completed a green checkbox will appear in SP flash tool which means installation is completed.
  • Enjoy now! Now you have successfully installed the stock ROM and your smartphone is unbricked.

Check out the video for easy installation and also check out our YouTube channel for the latest update on Android.


We hope you guys have enjoyed reading our blog and if this tutorial has helped you then please make sure to subscribe to our YouTube channel and turn on the notification so that whenever we post a new video on Tips & Tricks you will be the first one to be notified about our new video.
Also Check: Get The Latest Android O 8.0 OreosBootanimation On Your Android 

Should Lenovo K4 Note Be Updated To Android M 6.0 (Marshmallow)

By // 1 comment:

marshmallow image showing alt text
Google has done an excellent work in updating the android with the latest updates. Recently on 1st June 2016 Lenovo has launched Android M 6.0(Marshmallow) OTA update for the k4 note users. But people are in confusion whether to update Lenovo k4 note to marshmallow or not.
Are there any bugs in marshmallow update or it perfectly fine?
How is the battery performance.?
Is the fingerprint sensor is working fine?
Is there any heating issue?
Is it the right time to update Lenovo k4 note to marshmallow?
                                                   android m image showing alt text
This article will surely clear all your doubts regarding the android marshmallow of k4 note and you can decide whether to update your android or not.

Pros Of Android M on Lenovo Vibe k4 Note

  • The best thing Android M (Marshmallow) 6.0 is that they have added five fingerprints option on Lenovo vibe k4 note.
  • You have got screen pinning on Android M on Lenovo k4 note.
  • You can adjust the volume of phone calls, media volume and alarm volume on Lenovo k4 note with the update of Android Marshmallow.
  • You can set permission on any app for the use of the camera. For example, if you disable the camera permission for WhatsApp then WhatsApp will not be able to use the camera.
  • You can set the permission for the usage of camera, microphone, contacts, media and location as well.
  • You can Lock-Unlock Apps with the fingerprint scanner.
  • You can customize tiles in the notification panel.
  • Font and display size can be changed to small or big according to your preferences.
  • Excellent battery Life with improved performance.
  • If you install some of the apps like Nova Launcher or Asus Launcher then you can create gestures for every single process which help to completely automate your android.

Cons Of Android M on Lenovo Vibe k4 Note

  • Auto rotate button is not working.
  • The microphone is not working during voice calls on WhatsApp or any other application.
  • Camera sound is always on.
  • Heating issue when games are played for more than 20minutes
  • Dolby Atmos speaker stop working frequently and It works only after a restart
  • At times, fingerprint scanner stops working and It works only after a restart
  • Virtual reality mode is missing in android marshmallow.
  • All the smart tricks of lollipop is missing in this android marshmallow.

Checkout this video of my YouTube channel  for the detailed explanation of Pros and Cons of Android M On Lenovo k4 Note
         

Final Verdict
I have been using android m 6.0 on my k4 note and I can say that it stable ROM and you can go ahead and get this one for your phone. Though there are some minor bugs but can be fixed with some tweaks. Developers are working to fix the bugs and soon all the issues will be fixed for sure.


How to Root Lenovo Vibe k3 or k4 or k5 without PC

By // 1 comment:
lenovo image showing alt text
Do you know what is rooting?
How rooting is performed?
Which devices are eligible to perform root?
Make one thing clear that you don't need to be an expert to get root access on your smartphone. You are here because most probably you are interested in rooting your android device. Rooting is useless unless you know the advantages of it. Stay tuned :) I will show you how to perform root and what are its advantages.


Note: Rooting may void your warranty and this method is only for educational purpose.

  • Rooting your smartphone let you access the real world of Android.
  • It helps you to remove all the bloatware applications that come by default when you buy a smartphone.
  • With the help of root access, you can install custom recoveries like Team Win Recovery Project (TWRP) and ClockWorkMod (CWM) or Philz recovery.
  • It helps you to optimize your battery.
  • It helps you to customize each and every single portion of Boot animations, screen layout, and color of the app drawer .
  • Protecting the apps becomes easy after root.
  • It helps you to customize the taskbar.
  • Most of the android phones come with locked bootloader but if you root your android then it is easy to unlock the  bootloader of your android.
  • It helps you to get the on screen keys if you don't have.  
  • With the help of some root applications, you can find your misplaced android phone.
  • Rooting Any Lenovo is simple and you can root your Lenovo in less than a minute.
  • This method will work only with Android Lollipop 5.0 or below but does not work if your smartphone is updated to Android Marshmallow 6.0

Follow the simple steps very carefully to root your Lenovo device without PC.

DISCLAIMER: We  have tested this method with Lenovo Vibe K4 Note and it worked perfectly fine. Passion Labz is not responsible if you damage your smartphone in case you do not follow the procedure correctly.

Steps to root your Lenovo device without computer
  • On your smartphone go to Settings<<Security<< Enable the unknown sources.
  • Download an app called Kingroot from kingroot.net
  • Install the app and open it.
  • Tap on Try to root.
  • It will start rooting your android.
  • You have successfully rooted your android.
After successfully rooting the phone you need to install an app called Root Checker from play store which is  for free and click on verify the root. And then you will get the confirmation message that your android is now rooted.
root checker image showing alt text

rooting image showing alt text

Check out the video below for the step by step easy procedure and don't forget to check out our  YouTube channel.


I hope this method has helped you to root your Lenovo Vibe Smartphone and If at all you have any doubts then COMMENT down below I will surely help you out in the best possible way:)


Important Note: This method will work only on Android Lollipop 5.0 or below, if your device is updated to Android Marshmallow 6.0 then watch the video below but make sure to install Custom Recovery on your android.


Easiest way to install Android M 6.0(Marshmallow) on Moto g 2nd generation

By // No comments:
moto g2 image showing alt textMotorola has launched Android M 6.0 Marshmallow update for Moto G 2nd Generation but many of the people are not receiving the OTA update. The reason can be you might have rooted your device or unlocked the bootloader. But do not worry we will help you out.Follow the steps mentioned below very carefully to Install Official Android M 6.0 Marshmallow on Moto G 2nd Generation.


DISCLAIMER: I have tested this ROM with Motorola's  moto g 2nd gen XT1068 and it worked perfectly fine and it is still working as of June 2016. You are responsible if you do anything wrong with your phone.

NOTE: Make sure to backup the data because all the data will be lost.

PRE-REQUISITES:
  1. Moto G must be rooted.
  2. The bootloader must be unlocked on your Motorola moto g 2nd gen.
  3. Must have TWP or CWM or Philz recovery installed on your android phone.
  4. Make sure the model number of your android is XT1068/69/63.
Keep in mind that unlocking the bootloader will void the warranty. Perform the procedure at you own risk.

Downloads:
This guide is only for those people who didn't receive the OTA update.

Follow the steps to install Android Marshmallow on moto g 2nd generation
  • Turn off your device.

  • Boot into CWM Recovery by pressing volume down button and power key for few seconds.

  • Click on Wipe data and when prompted select yes to wipe data

  • Go back and click on Wipe Partition and select yes to wipe.

  • Go back and click on advanced and select wipe Dalvik cache and select yes to wipe.

  • Select install zip from SD card and select CM13.

  • The installation will take four minutes approximately.

  • Reboot your smartphone.

  • The first reboot will take a long time so do not panic.

  • You will see a new logo and new boot animation on when it is switched on.

  • For the first time, you need to select your language and provide the necessary information like email id and you must be connected to the internet via Wi-Fi or Mobile data.

  • After the phone is turned on go settings<<About Phone and there you will find Android Marshmallow 6.0 running on your moto g2.

  • Congratulations! You have successfully installed android m on your moto g 2nd gen.

Features of this ROM:
  • New settings of System UI tuner.
  • New UI of camera app and music app.
  • Improved battery strength.
  • Screen recording feature.
  • Inbuilt root access.
  • Navigation keys can be customized.
  • A new feature of Doze mode is available which speed up the processes.

Problems in this ROM:
  • Torch does not work every time.
  • Frequently we get a message saying "Android OS have stopped working".
  • Mic does not work in some of the apps like WhatsApp messenger.
  • Location accuracy is not perfect.
  • Auto sync is not working so you need to sync the data manually.
There are some problems in this ROM but can be minimized with some tricks. If you want any further help from me then contact me through any social media sites, I am social.


.